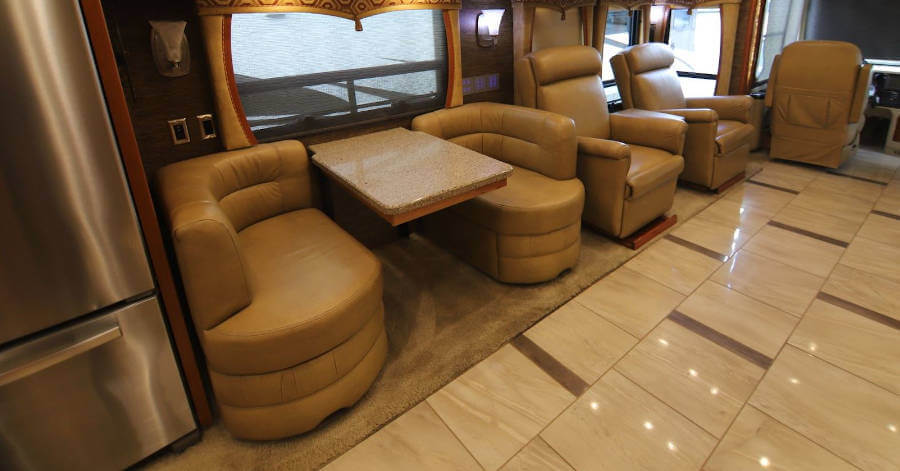
Our Newmar Mountain Aire RV has beautiful porcelain tile in the main areas but had carpet on the living room slide and in the bedroom. We don’t like to have carpet in an RV since it gets dirty easily and can hold odors, so we began investigating replacement flooring materials.
We did many hours of research to decide what to use on our RV’s floor. Since several of our readers asked us to share what we did and how we did it, here’s a detailed post about replacing your RV carpet.
Removing Carpet Is A Great Time to Remodel Your RV
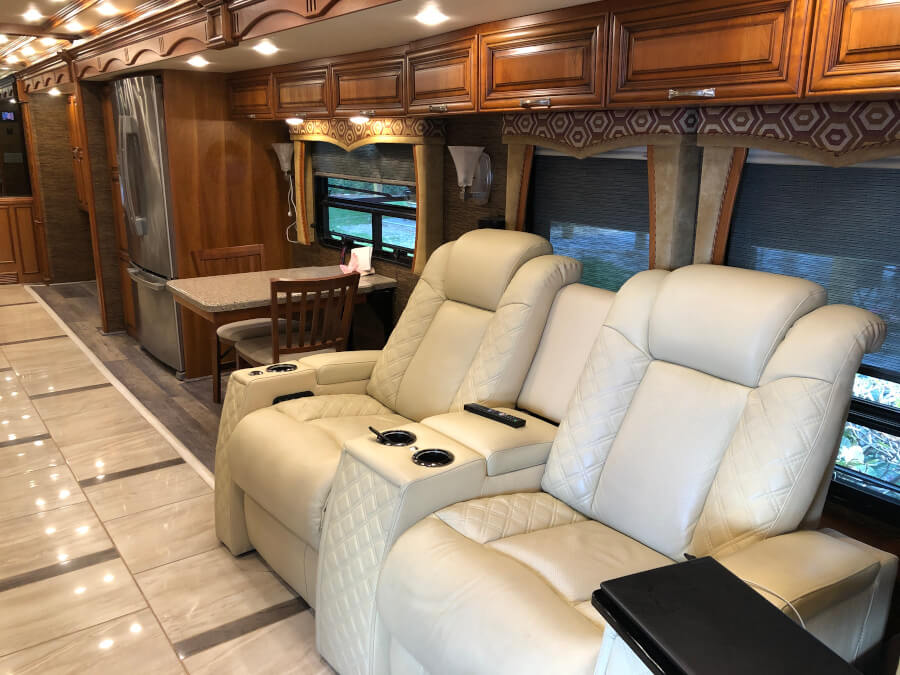
We also decided to remove our RV booth dinette and replace our RV recliners with theater seating which we cover in other posts.
Can You Replace Your RV Flooring?
Yes, you can replace your RV flooring yourself. Most RV carpet is stapled down to a plywood base floor and is attached to the edges with tacking strips. You can remove the carpet by pulling it up from the floor using pliers and a razor knife to cut it into sections. It’s a good idea to wear utility gloves to protect your hands.
After removing the carpet, you will need to get all of the staples and nails out of the subfloor. A pry bar, a flat head screwdriver, and a small hammer can be used to remove the screws, nails, and staples that were securing the carpet and the underlayment to the plywood base.
By the way, as an Amazon Associate, I earn when buying qualified products through links on my site.
What Flooring Can You Replace Your RV Carpet With?
As we learned, there are several options when replacing your RV carpet. You can use stain-resistant carpet, tile, wood planks, or the new rigid core vinyl planks. Each has its own pros and cons. Before choosing what to replace your RV flooring with, consider how often you use your RV, whether you have pets or kids (or grandkids), and what weight limitations your RV may have.
We investigated the different options and here’s a quick summary of what we learned including the pros and cons, the costs, and the most important factor- what each type of flooring weighs!
Stain Resistant Carpet-
Pros-
- Warmer in cold climates if you don’t have heated floors
- Softer on the feet and quieter to walk on
- Not as heavy as other flooring material
Cons-
- Requires constant vacuuming to keep clean
- Easily absorbs odors
- While stain resistant, it may still get pretty dirty with pets or kids
Cost-
Quality stain-resistant carpet isn’t cheap and will cost approximately $5.50 per square foot. Don’t forget to add the carpet padding at another $1.50 per square foot and your carpet tack strips to hold it in place which adds about another $40.
Average Total Cost for 100 square foot area excluding installation- $750.00
Average Carpet and Padding Weight-
2 pounds Per Square Foot= add 200 pounds to your RV cargo weight for a 100 square foot area
RV Tile Flooring-
Pros-
- Easy to clean
- Doesn’t absorb odors
- Great for pets and kids
Cons-
- Colder in cold climates if you don’t have heated floors
- Hard to match if replacement tile is needed
- Weighs more than other floorings
Cost-
Laying floor tile can be a labor-intensive job and if you are not experienced, it can be messy. The cost varies significantly, based on the tile you choose. Ceramic tile can cost as little as $2 per square foot, while porcelain tile ranges between $6-$13 per SF. On average the cost of labor to install a tile floor is between $7-$13 per square foot.
Average Total Cost for 100 square foot area including installation- $1200
Average Porcelain Tile Weight Installed-
Heavy! At about 4 pounds Per Square Foot depending on tile and underlayment- that adds about 400 pounds for 100 square feet- way too much!
RV Wood Flooring-
Pros-
- Easy to clean
- Doesn’t absorb odors
- Easy on the feet
Cons-
- Can warp in humid climates
- Easy to scratch so not so great for pets and kids
- Can be heavy
Cost-
Hardwood flooring costs vary greatly depending on the quality and type of wood you choose. Our research found prices from $2.50 to $11 per square foot, so it just depends on what wood flooring you pick. We found a good quality birch wood floor at $4.25 per square foot. You will need underlayment for wood flooring and a wooden transition and quarter round trim for the wall edges
Total Average Cost for 100 square foot area excluding installation comes in around $600.
Average Wood Flooring Weight Installed-
1.5-2 pounds Per Square Foot- so adding another 200 pounds for 100 square foot area to your RV cargo weight!
Rigid Core Vinyl Flooring-
Pros-
- Easy to install with interlocking planks
- 100% Waterproof so no warping or buckling like wood floors
- Doesn’t absorb odors like carpet so great for pets and kids
- Lighter than tile and wood
Cons-
- Requires that you remove existing uneven flooring
- Must be careful not to break interlocking tongue and groove when installing
- Cannot be repaired if damaged as wood floors can
Cost-
Installing a rigid core vinyl floor is pretty easy. It’s also pretty inexpensive at anywhere from $2.00-$3.00 per square foot. Since there’s no need for an underlayment (it’s already built-in), the only thing you need is quarter round for the trim and a transition strip. We purchased the matching trim from Home Depot and the transition strip from Newmar.
Total Cost for 100 square foot area excluding installation-
Vinyl Planks- 6 boxes at approximately $55 per case = $325
Quarter round trim molding- 3 sticks at around $9.00 each = $27
Transition strip from Newmar- $35
Total Cost- $387
Average Vinyl Laminate Flooring Weight Installed-
At only 27 pounds per 19.50 square feet, this is one of the lightest options in terms of weight. Covering 100 square feet will only add around 125 pounds to your cargo weight.
What Should You Consider When Replacing RV Flooring?
RV Flooring Weight
As mentioned above, weight plays a big factor in your RV, not just in safety, but fuel mileage and tire wear. When deciding on replacement flooring, make sure to calculate how much the flooring material weighs.
Why is Weight a Factor When Replacing RV Flooring?
We wrote a detailed post about knowing your RV weight limits, but the short answer is that your RV is designed to carry a specific maximum of cargo weight. It doesn’t matter if the cargo weight you add is food, passengers, gear, or flooring, it is dangerous to overload your RV!
If you want to learn more about how RV weights affect your tires and safety you can read Can You Prevent a Blowout on Your Class A RV?
RV Slide Movement
Are you planning on replacing your flooring on your slides as we did? Once you determine the flooring materials you would like to use, contact the flooring manufacturer to learn the approximate installed weights.
Then you should contact your RV manufacturer and ask if those weights will be too heavy for your RV slides to move smoothly in and out.
Durability for Your RV Lifestyle
If you only use your RV occasionally or don’t have pets or kids, carpet may be fine for you. Since we are full-time RVers with a dog, we wanted something that didn’t show the dirt, was easy to clean, and didn’t hold odors.
How Much Flooring Are You Replacing in Your RV?
Think about whether you would be better off replacing all of your RV flooring, or just some of it. In our case, we found flooring that complemented our existing porcelain tile very well.
If you have a lot of cracked or broken tiles in your RV, or your floors are uneven or warped, you may be better off replacing all of the flooring.
You should make this decision before you select your new RV flooring and begin the project. It can be a lot of extra work to realize halfway through the job that you really needed to pull the whole floor up!
What RV Flooring Did We Choose to Replace Our RV Carpet?
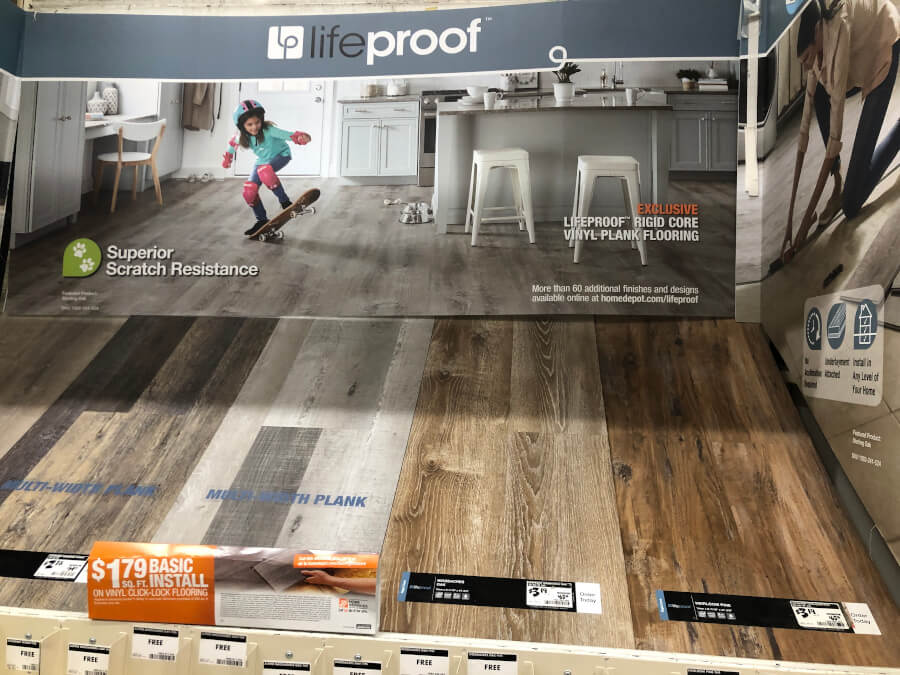
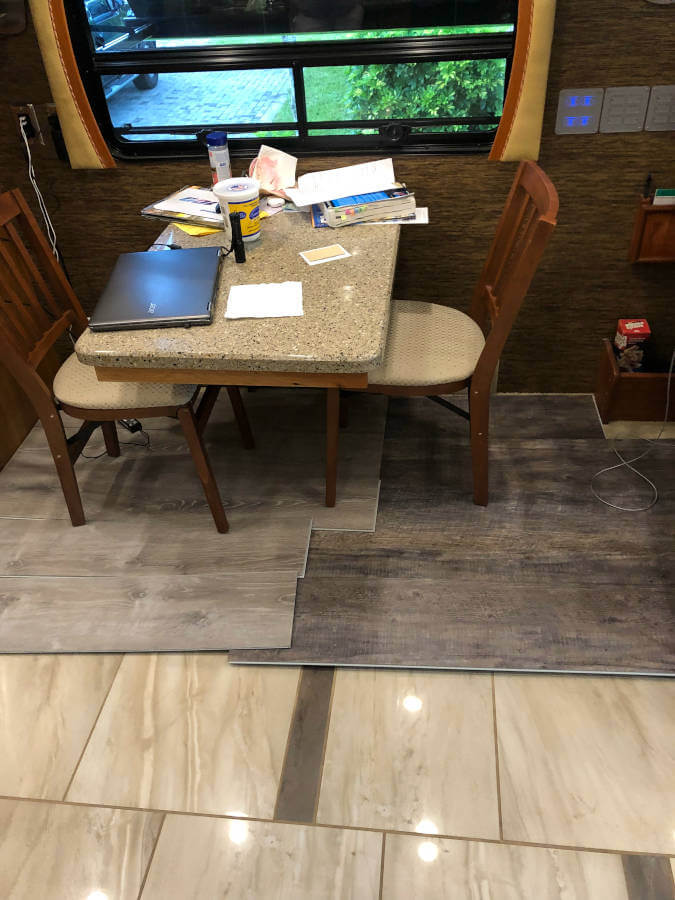
Since our existing porcelain tile in our RV is in good shape, we didn’t need to pull up the entire floor. We also found a good complementary color in Rigid Core wood look vinyl planking.
We picked LifeProof™ Rigid Core Vinyl Plank Flooring to replace our RV carpet. We purchased ours at Home Depot and found their selection of colors and different brands to be very good. LifeProof is the brand that is made specifically for Home Depot, but there are many other manufacturers with lots of colors to choose from.
The flooring we picked met all of our criteria. It’s lightweight, durable, easy to clean, and looks great! What do you think of our new floors?

Why Did We Choose Rigid Core Flooring For Our RV
We liked the beautiful wood look, it’s 100% waterproof and very durable. Plus, the LifeProof brand does not require installing any underlayment since it’s already attached to the back. What that means is, provided your floor is level, you only lay the floor itself. No underlayment or base is needed.
It’s also designed to use a floating floor installation process.
What Is A Floating Floor?
A floating floor isn’t a type of flooring material, but an installation process. Traditionally, flooring is held in place by nailing or gluing it to the subfloor surface. Floating floor materials are made with tongue and groove joints that fit together and lock in place. There are made to expand and contract with humidity and temperature changes without buckling.
Tip- Normally you don’t attach floating floors, but since we installed ours on our RV slide out, we decided to tack down the inside edge with a couple of brass screws. That way the floor can continue to expand and contract as designed but will not shift during travel. If you decide to do this, hide the screws under your trim strips.
How To Replace Your RV Carpet With Rigid Core Vinyl Flooring in 10 Steps
Replacing your RV carpet with rigid core vinyl flooring takes some time, but is well worth the effort. No matter what color or brand you select, the steps to doing the job are pretty much the same. What follows is an overview of the step-by-step instructions along with tips we learned as we replaced our RV floors.
There are detailed installation instructions included with all brands of Rigid Core flooring. Here’s a YouTube video from Home Depot that shows how easy it is to install the LifeProof brand.

Step 1- Prepare Your RV Floor for Installation
Remove any furniture that you plan on installing the floor under. No need to remove your RV refrigerator or cabinets, you are going to install the flooring right up to the edge of them.
Carefully remove any of your existing base, shoe molding, or thresholds. You can reuse these to cover the ¼” expansion gap required around the edges of the room.
After removing the carpet, remove all nails, staples, and any foam padding that may have been under the carpet. You must get all of the staples and nails out as they can push up and puncture your new floor.
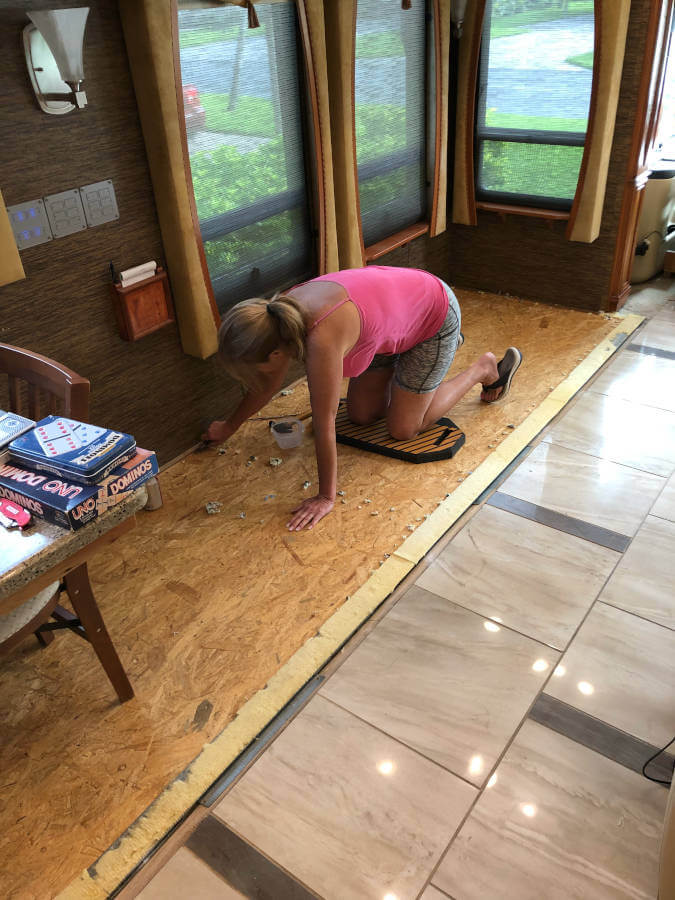
Tip: Notice I am using a kneeling pad to protect my knees? Easier than knee pads and very versatile!
Pulling up your RV carpet is a great time to do some remodeling as we did and Replaced Our RV Booth Dinette and Installed Theater Seating to replace our RV recliners. We’ll give those details in other posts to follow.
Tip: Cut the carpet into strips as you pull it up and roll the pieces up and tape them closed. This makes it easier to dispose of.
Step 2- Measure Your RV Floors
Measure the length and the width of your RV floor. Multiply the numbers together to get the total area. Add 10% to account for waste that you will make as you cut around doors and corners.
Step 3- Purchase Your RV Flooring, Moldings, and Trim
Once you choose your flooring color make sure to purchase all of your flooring and trim at the same time. Sometimes there are minor shade variations during different manufacturing runs. To minimize these variations, check the run numbers on the side of the box to make sure you are purchasing from the same lot.
LifeProof uses an eight-digit run number system based on dates beginning with the 2-digit day, 2-digit month, and 4-digit year.
For the trim and transition strips, Home Depot sells them in matching colors.
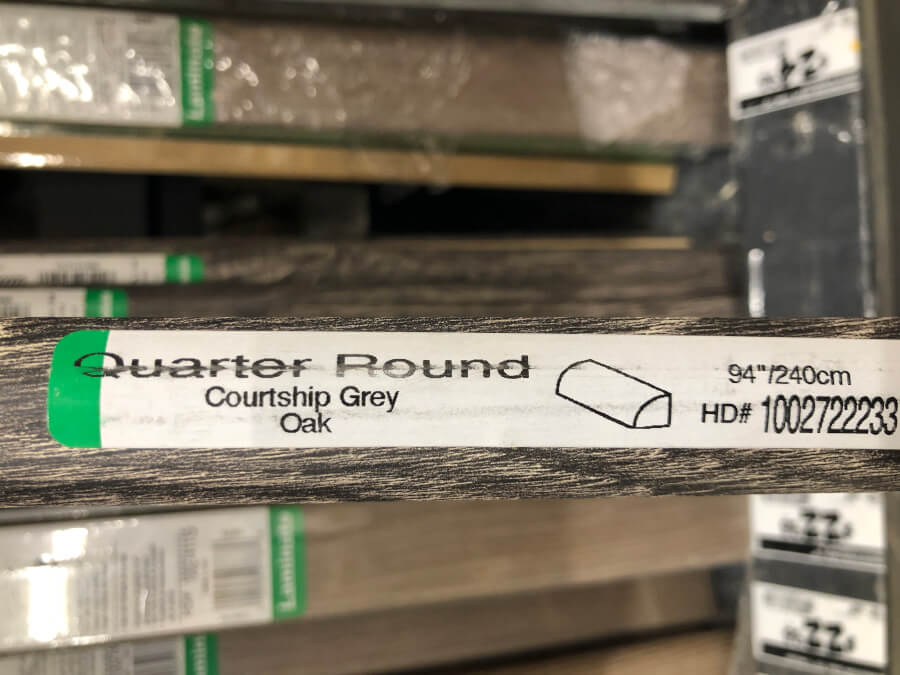
Tip- We decided to use the rubber transition strip Newmar uses on all of their new RV’s. It’s inexpensive, comes in a couple of complementary colors, is easy to install, and is made for exactly this use. Contact Newmar Customer Service to order: 800-731-8300
Step 4- Installation Tools Needed
Here’s a list of installation tools you will need, so while you are at Home Depot shopping for your RV flooring don’t forget to pick any of these up that you don’t already have.
- Utility Knife and extra blades
- Measuring Tape
- Utility Gloves to use when pulling up carpet
- Duct tape or any strong tape to hold rolls of carpet closed to make it easy to move it
- Pencils
- Pull Bar
- Square
- Multi-Tool (not necessary but very helpful) it helps when making for L shaped cuts or under door jams
- Rubber Mallet Hammer
- Straight Edge
- 1/4” (6mm) Spacers
(Tip- we used paint stir sticks as spacers- perfect size and easy to handle instead of tiny spacers) - Profiled Tapping Block
(Tip- we just used a piece of scrap from one of the trimmed pieces of flooring) - Kneeling Pad
- Eye Protection
- Broom and vacuum
Step 5- Cutting Your Beginning Planks To Size
Don’t worry, this isn’t that hard! To make sure your floor looks uniform you need to trim the beginning length and widths of your vinyl planks correctly to start.
Starting with correctly trimmed planks will give the room a balanced look at the end of the job. It will also avoid having small pieces at the end of any row.
Cutting Your First Plank for the Room Length
Measure the length of your room in inches. Subtract ½” from the total length to account for the ¼” gap you are going to leave on either side of the floor to the wall. Divide it by the length of the planks. Be sure to allow for a ¼” gap on either end by using the spacers.
239 ½” total length
239 ½” – 1/2 “= 239
Room length in inches Plank length in inches Total Planks
239 divided by 47.6 = 5
Planks
47.6” x 5 = 237.5”
Room Planks
239 minus 237.5 equals 1.5” which is less than 8”
If the calculation results in less than 8”, then you need to cut some off of your first plank to avoid having planks less than 8 inches on the opposite end.
Cutting Your First and Last Plank for the Width of the Room
Measure the width of the room and divide it by the width of the plank.
If the number is less than half the width of the plank, you’ll need to trim the first and the last row to equal widths.
Don’t worry if this all sounds too confusing! You can download this free template that will walk you through the steps!
FREE DOWNLOAD
Step 6- Remove Dust and Debris
Vacuum your RV floor to remove any dust or debris. You don’t want that under the vinyl planks.

TIP- A small shop vacuum comes in very handy on this and many other jobs on your RV!
Step 7- Laying Rigid Core Vinyl Flooring In Your RV
Begin on your first row. The boards will snap and lock together. Once in place, run your hands over it to make sure it’s smooth. These fit into place perfectly, so if there’s any gap or ridge, you need to adjust and tap into place using a scrap piece placed against outside seam and GENTLY tap into place.
TIP- When you reach the end of a row and have to cut the length to fit, instead of measuring for the cut, flip the board end to end. Lay the plank into place and push it up against the wall spacer. Then mark the excess that overhangs the plank you previously installed. This is the piece you will cut off.
REMEMBER TO FLIP THE PLANK BEFORE MARKING OTHERWISE YOU WILL CUT OFF THE END YOU NEED TO KEEP AS IT HAS THE LOCKING GROOVE.
When all seams feel smooth, take your rubber mallet and tap on the top of the seams to lock each joint into place.
TIP- To get a good fit around door jams and irregularly shaped areas, make a template using a piece of paper. Place the pattern upon the plank and trace. Cut along the traced lines using a utility knife or jigsaw. Don’t forget to leave that ¼” gap!
Step 8- Finishing Your Rigid Core Floor Installation
It’s highly likely that the entire length of your last row will need to be cut so that it is narrow enough to fit. Don’t forget to cut your first plank of the last row following your stagger pattern and leave your ¼ gap. Once you slide the last plank in with the cut side to the wall, use your pull bar to lock the long edges together. Make sure not to use the pull bar on the short edges!
Remove your spacers and move on to installing your trim and transition.
TIP- Save some of your leftover planks if possible. That way if you ever have to replace a plank, you will have some that match your floor.
Step 9- Installing the Trim
We purchased ¼” round trim pieces to match the floor. Our replacement floor required three eight-foot strips of quarter round.
We attached the pieces to the floor using Versaf Acrylic Mounting double-sided tape and small brads.
Step 10- Install the Transition Piece
You will need a transition piece where your slide meets your main floor. We tried a few different options that they sold at Home Depot, but none seemed to look right since they are made for homes. This is probably because our slide is a Flush Floor Slide. After much investigation, we decided to order the transition strip from Newmar. It’s flexible, fits perfectly, and is easy to install using a heavy-duty double stick carpet tape to attach it to the vinyl.
What is an RV Flush Floor Slide?
A Flush Floor Slide is an RV slide that when the slide is extended, the floor of the slide drops down to meet the main floor. This creates a small gap that you will need to use a transition piece to bridge the gap.
How Much Did Our RV Replacement Floors Cost?
The total cost for our new rigid core vinyl floor to replace the carpet on our slide was under $400. We only had carpet on the slide, so if you are replacing your entire RV floor you will need to factor that into your total costs.
How Long Did It Take To Install Our New RV Floors?
In total, it took about 4 days to install our rigid core floors. The most time-consuming task is the preparation of the floors. Every staple, screw, and nail must be removed from your existing subfloor or pounded down flat so it doesn’t puncture the planks.
Would We Recommend This Product?
Yes, we highly recommend the LifeProof brand of Rigid Core Vinyl floors. They are excellent quality, easy to install, 100% waterproof, and look fantastic!
TIP- Floor samples are available free at Home Depot. Go pick out a few and try them out for a few days before you select your new floor color. We selected the Seasoned Wood and are very happy with it!
Cleaning Tips for Rigid Core Floors
- Use a pH neutral floor cleaner
- Sweep or vacuum regularly to keep dirt from scratching the finish
- Don’t use a steam cleaner, it can remove the color
- Don’t vacuum with a beater bar
- Don’t use was, oil or polish
- Don’t use dust cleaners as it may damage the finish
- Don’t use vinegar to clean it- This one surprised us since we clean a lot with vinegar!
- Don’t use All-Purpose or Multi-Purpose cleaners