With spring fast approaching, you are probably looking forward to another fun adventure with your motorhome. If you live in a part of the country that gets so cold that you have to winterize your RV, it won’t be long before it’s time to de-winterize it. We’re providing a detailed checklist on how to De-winterize A Class A RV.
Class A RVs generally have more systems than other smaller RVs and therefore require extra steps to get them ready for use.
Some people have the RV dealerships winterize and de-winterize their motorhomes. It’s pretty easy if you want to do it yourself. We created this checklist to help you de-winterize a Class A RV.
When Should You De-winterize A Class A RV
When you de-winterize your RV depends entirely on the weather in your region. You need to be certain that the last freeze of the winter season is over before de-winterizing your RV system.

How Long Does It Take To De-winterize A Class A RV
It will take at least half a day and up to a whole day to de-winterize a Class A RV, depending on how many systems you have.
During the winterization process, some motorhome owners use an air compressor to blow all the water from their RV water lines and do not add antifreeze.
If you did add antifreeze during your RV winterization process, your plumbing systems will require thorough flushing. This takes a little more time to complete.
Plan On A Minimum of 4 Hours to Sanitize Your RV Plumbing
If you are sanitizing your water system (which is highly recommended), it can take a minimum of 4 hours to overnight.
19 Steps to De-Winterize A Class A RV
- Do Your RV Chassis Batteries Need Charging?
- Are Your RV Propane Systems Working Correctly?
- Clean Your RV Air Conditioning Vents
- Inspect Your RV Interior For Any Leaks
- Turn On All Appliance Breakers
- Do Your RV Slides Open and Close?
- Check Your Motorhome Hydraulic Jacks
- Inspect Interior RV Cabinets and Exterior Basements
- Drain The Antifreeze From Your RV Plumbing Systems
- Sanitize Your RV Water System
- Replace All of Your RV Water Filters
- Replace Your Smoke Alarm and Carbon Monoxide Batteries
- Check the Dates On Your RV Fire Extinguishers
- Check Your RV Tires
- Check Your RV Sewage System
- Run Your Motorhome Engine
- Start Your Generator
- Reinstall or Replace Windshield Wipers
- Wash and Wax Your RV Exterior
Check Your RV Batteries
Wet-cell deep cycle batteries:
Clean all battery terminal connections to remove any corrosion with a commercial battery contact cleaning product or make a cleaner of one cup of baking soda mixed with one gallon of water and scrub with a toothbrush. Check charge and add distilled water as needed to top off levels.
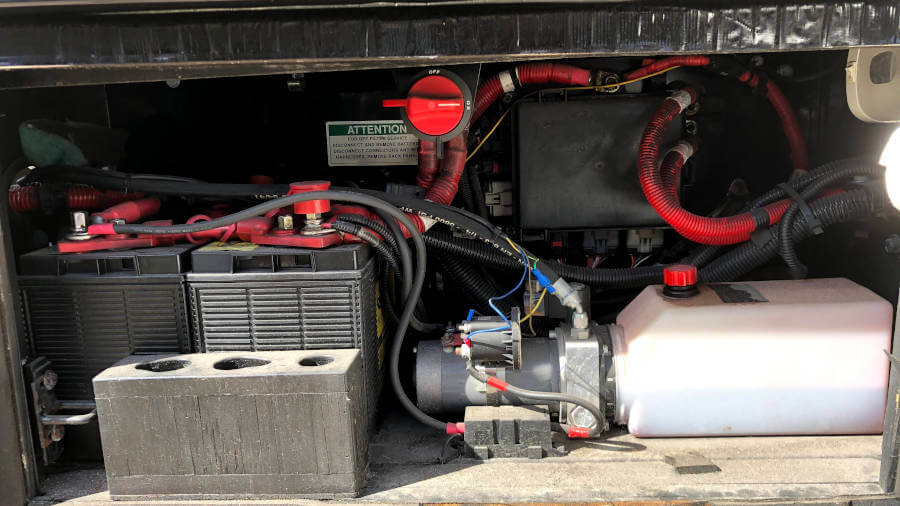
Lithium Iron Phosphate Batteries:
Reconnect your battery switch and top off the charge. Since Lithium batteries have a very slow discharge rate, chances are they only lost 2-4% of their charge each month your RV was stored.
Check Your RV Propane systems (if equipped)
If your RV has propane, you should check the system for leaks. It’s easy to do, but make sure you don’t smoke while doing it!
Not all RVs use LP gas, and the larger Class A motorhomes have built-in propane tanks. This process assumes that you topped off your propane tanks before storing for the winter (or at least have enough propane to test the system and appliances).
Test Your Propane Lines for Leaks
Turn off all appliances that use propane, then go to your propane valve and turn it on slightly (about a quarter of an inch turn should do it). Check the propane valve and hoses for leaks by wiping it with a wet soapy rag or sponge. Any escaping gas will cause bubbles to appear where you wiped your soapy solution.
If you don’t see any bubbles, do a quick sniff test inside your RV and near any gas appliances. Propane has a very distinctive offensive smell (like rotten eggs). If you don’t smell anything and you don’t see any bubbles on your propane valve or hoses, then it’s time to check your gas appliances.
Test Your Propane Appliances
Go to your gas appliances and turn them on for a couple of minutes to assure they are all working properly. If they shut off, try restarting them as they may have air in the lines.
Tip: DO NOT leave your RV until you have turned all gas appliances off. It’s easy to get distracted while de-winterizing, so just stay focused on this task until complete.
If you suspect you have a gas leak or have any issues in restarting your RVs propane appliances, STOP and contact a licensed RV technician.
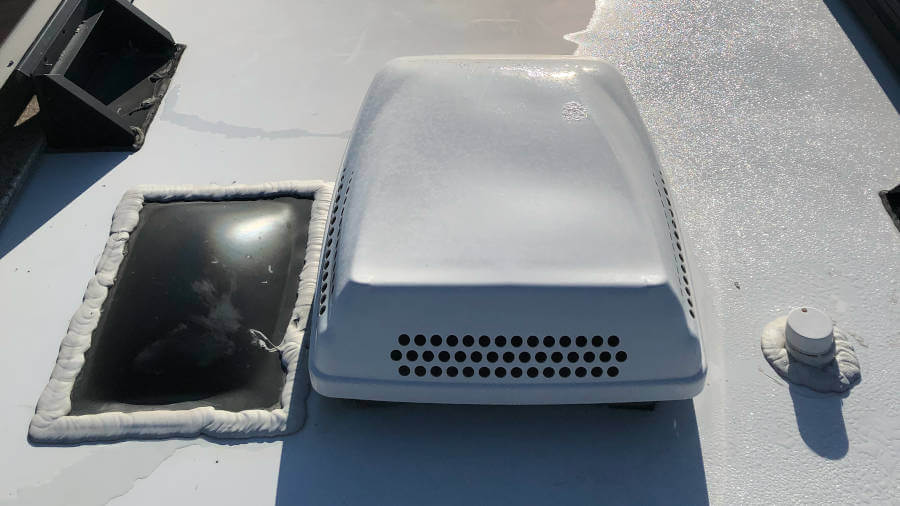
Check Your RV Exterior Air Conditioning Vents
Make sure that no debris has accumulated around your air conditioning vents. Now is an excellent time to clean all of your air conditioning filters before powering up your AC system.
Check Your RV Interior For Any Leaks
If your RV has been stored outside during the winter, there’s a chance that you may have developed some leaks. Check all of your RV windows, doors, vents and skylights for any signs of interior damage from leaks.
If you do find some leaks, often it’s a simple repair of replacing worn-out caulking or seals. This is also the right time to lubricate your windows and door tracks with dry lube.
Turn On All RV Appliance Breakers
The next step to de-winterizing your RV is to test the appliances. Turn all of your appliance breakers back on and test each one to make sure everything works.
Check Your RV Slides
Some RV manufacturers recommend that you open slides first, before lowering your hydraulic jacks, and others say jacks first then slides. Follow whichever order your motorhome manual recommends to open your slides.
Open your slides and use your portable RV air compressor to clean out any debris or dirt. We purchased the VIAIR compressor kit because it is specifically made for RVs and has a 60-foot air hose, so we can easily add air to our RV and tow tires.
Next, you should check your slide seals and lubricate them with a rubber seal conditioner. Do they all look in good condition with no cracks?
Do Your RV Slides Require Lubricant?
Check your RV manual to find out if your slides require lubricant. Our Newmar Mountain Aire does not, but your RV might. If your motorhome manual instructs you to lubricate them to eliminate any squeaks and operate smoothly, it’s easy to do. This 3-IN-ONE Slide-Out Silicone Lube is specifically made to help prevent rust and corrosion and is inexpensive and easy to apply.
Check out this video showing how to lubricate RV slides.
Check Your RV Hydraulic Jacks
Run your hydraulic jacks up and down a few times and make sure there are no leaks or corrosion. After the jacks are fully retracted, wait a few minutes for the fluid levels to settle, then check your hydraulic fluid level and top off as needed.
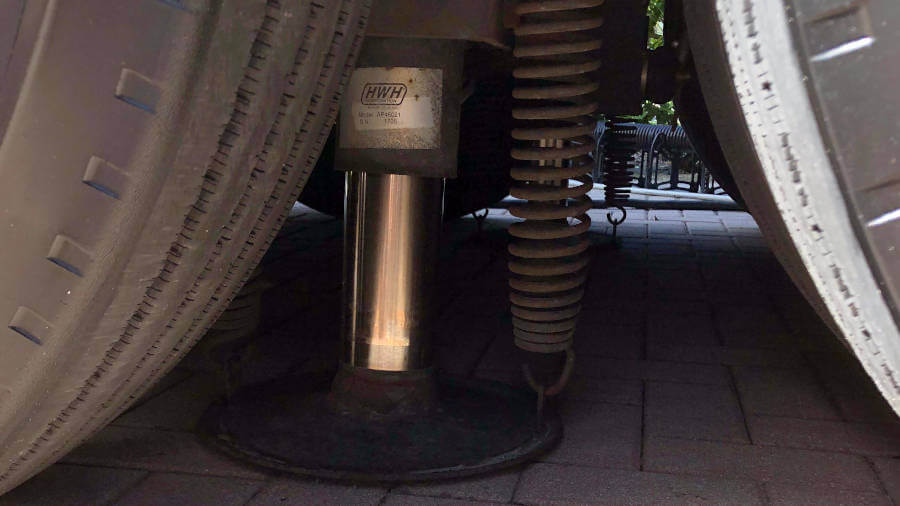
Always remember to check your hydraulic fluid levels with the jacks in the retracted position, otherwise, you will overfill the tank.
If your RV has an air leveling system as ours does, there’s really nothing that needs to be done to de-winterize it. Verify proper operation of the leveling system in accordance with the operating manual.
Inspect Your RV for Any Pest Invasion
Since your RV has been sitting through the winter months, some pests may have found their way in. Check all of your interior RV cabinets and exterior basements for any signs of pest invasion.
If you do find signs that some unwanted pests have decided to make your motorhome their own, thoroughly clean out any nests or debris and apply the appropriate repellants
Drain the antifreeze from your RV plumbing systems
It’s extremely important that you don’t leave while completing the antifreeze flushing process in case there are some leaks that have developed in the lines during the winter. Water-line leaks can cause significant damage to your motorhome and be very costly to repair.
To drain the antifreeze from your plumbing systems, you will need to connect to a potable water supply.
Turn on your city water supply and then open all faucets and turn on your showers (both indoor and outside) to flush the fluid from the lines. Make sure to run them on both the hot and cold settings.
Flush toilets several times until the water is no longer pink.
Flush the Antifreeze From Your Appliances
Run your washing machine and dishwasher thorough a complete cycle before using it.
Place a container under your refrigerator water dispenser and run until the water runs clear. Turn on your refrigerator ice maker and run through several cycles until the ice is clear. Clean out the ice maker tray to prepare it for fresh ice.
How To Dispose of RV Antifreeze
The type of antifreeze that is used for RVs is propylene glycol, sometimes referred to as the pink stuff.
It is non-toxic and can be disposed of in any RV waste water dump station where you can legally empty your tanks.
Sanitize Your RV Water System
You need to sanitize your RV water system after it has been sitting all winter. It’s also recommended that you sanitize your motorhome water lines at least once per year, so this is a great time to do it.
Tip: You should sanitize your system AFTER you have flushed the antifreeze from the system, but BEFORE you de-winterize your hot water tank and also BEFORE you replace your freshwater filters.
What Do You Use to Sanitize an RV Water System?
Sanitizing your RV systems is best done with regular, plain household bleach (with no perfumes or additives) and requires ¼ cup of bleach per 15 gallons of fresh water.
Make sure you don’t use any scented bleach, just regular Clorox or any other plain bleach will work. A small bottle of bleach should be all that you need.
How Long Does It Take To Sanitize Your RV Water System?
RV Manufacturers recommend that you let the bleach mixture sit in your water lines overnight to get the best results. If you want to rush it, you can let it sit for a minimum of four hours. We let ours sit overnight to be sure that it’s good and clean.
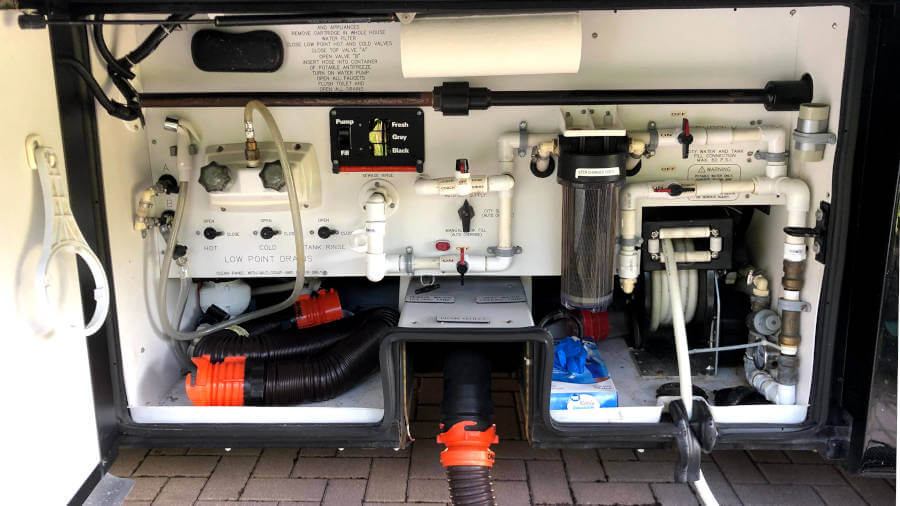
How To Sanitize Your RV Water System
Every motor coach system can be slightly different, but there are 10 basic steps to sanitizing your water tanks:
- Turn off your city water connection
- Drain your RV fresh water tanks and lines
- Add the bleach mixture to your freshwater tank and refill
- Turn on your RV water pump
- Turn on each faucet and shower (both hot and cold) and run until you can smell bleach and flush toilets a couple of times
- Turn off the water pump and let the water sit in the lines overnight if possible
- Drain the water tank of the bleach solution
- Refill the fresh water tank with clean water and turn on the water pump
- Turn on all faucets and showers and run clean, freshwater through until bleach smell is gone
- Refill water tank and replace all water filters
DO NOT run the bleach sanitizing solution through your Aqua-Hot or Oasis hydroponic water heating systems.
You can damage your system and it will not be covered under warranty!
How To De-winterize A Class A RV Hot Water Heater
You should wait to do this step until after you have sanitized your RV water system since this step requires that your RV water tank be drained.
Make sure your hot water tank drain plug has been reinstalled. Open your water heater valves and close the bypass valve. Turn on your water supply. Open all of your hot water faucets and let run until your water heater is filled and no more air comes through the faucets. Turn on the water heater switch.
De-Winterize Hydroponic Water Heating System
De-winterizing your hydroponic water heater (Aqua-Hot or Oasis) is simple. Run fresh water through your hot water lines until hot water is free of anti-freeze.
Replace All RV Water Filters
Your RV water filters should be replaced at least once per year. Don’t forget to replace the refrigerator filters.
Tip: Write the date that you replaced the water filters on the side of the filter. That way if they seem to wear out faster you can investigate the cause.
Check your smoke alarm and carbon monoxide alarm
Replace your smoke alarm and carbon monoxide batteries. Test the alarms to make sure they are working properly.
Check Your RV Fire Extinguishers
Fire extinguishers have an expiration date. Check the dates and replace them as needed.
Check Your RV Tires
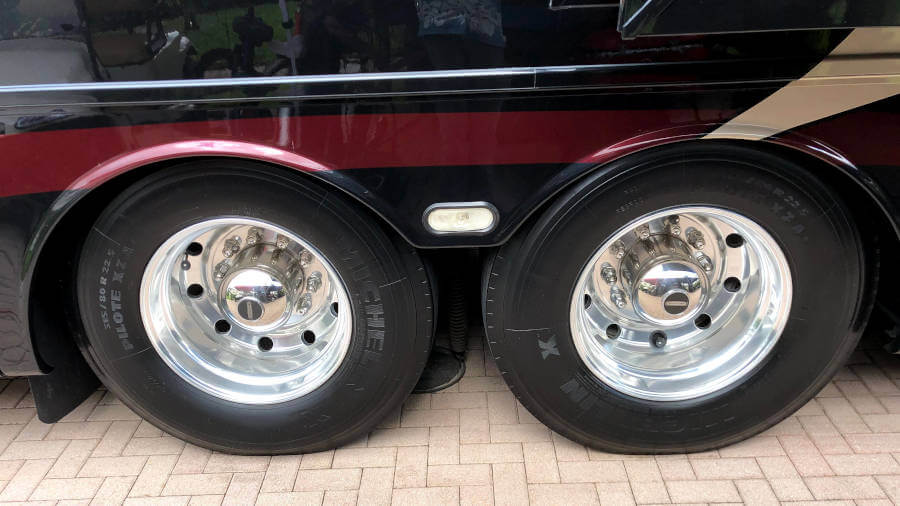
Remove your protective tire covers and check your RV tire pressure. Inspect your motorhome tires for any cracking or signs of wear.
Tip: Improperly inflated RV tires can cause blowouts!
Check Your RV Sewage System
Check your dump hoses for leaks and check that the seals on waste tank valves are in good condition.
Check Engine Fluids
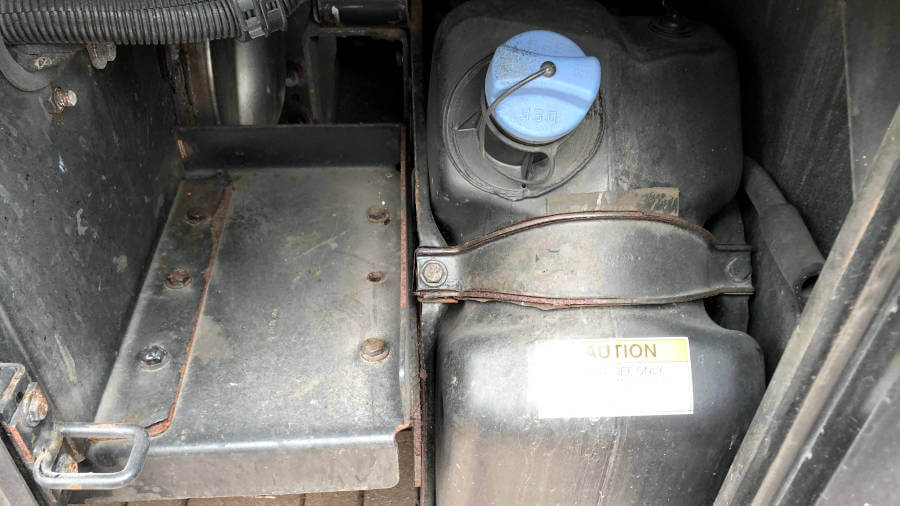
Check all engine fluid levels according to your RV manuals and add fluids as necessary. If you have a diesel motorhome, don’t forget to check your Diesel Exhaust Fluid (DEF) levels.
Start your motorhome engine and let it run until warm, then check your fluid levels again and verify there are no leaks.
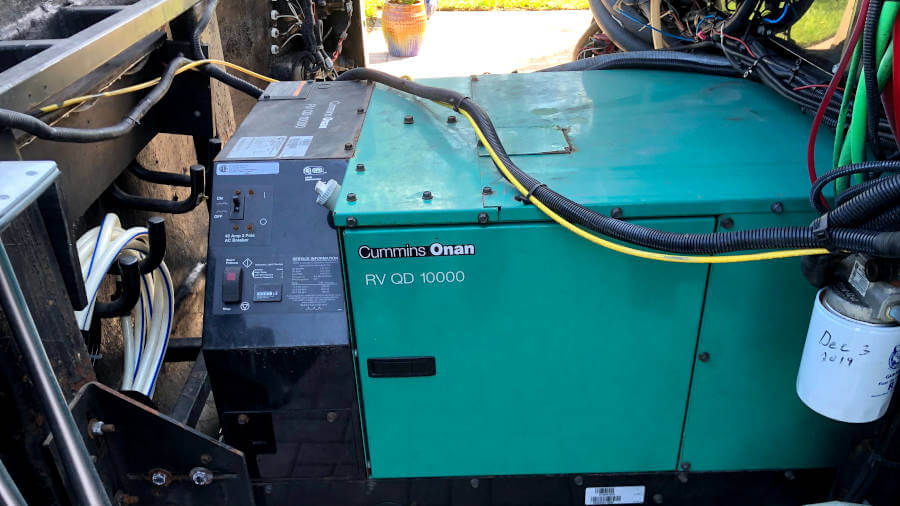
Start Your RV Generator
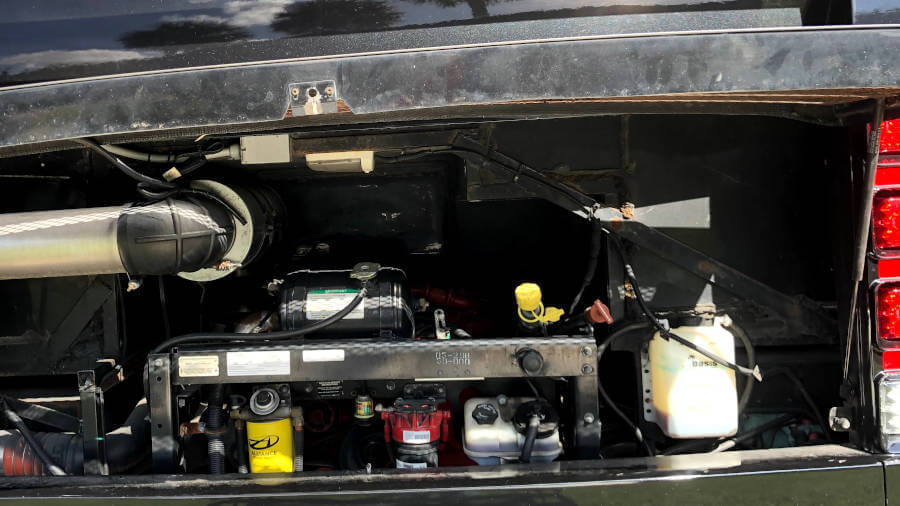
Reconnect your Auto Gen Start and check all fluids, topping off as needed. Clean and check your battery connections. Check your generator’s air filter and fuel filters and replace them if needed.
Run your Genset for two hours with a 50 to 70 percent load.

Windshield Wipers
Reinstall or replace your RV windshield wipers and top off windshield washer fluid as needed.
Wash and Wax Your RV Exterior and Check Your Awning
You should wax the exterior of your RV at least once per year. A good coat of wax gets your motorhome ready for your travel season and protects the exterior.
Open your RV awning and check for any trapped debris that could cause damage to your awning fabric. Make sure the awning closes smoothly and is in the proper position for travel.
That’s the 19 Steps to De-winterize A Class A RV. You should be ready for the RV season!
People Also Ask
- Do you have to De-winterize A Class A RV before driving it? Yes, you must de-winterize A Class A RV before using it again.
- Can you De-winterize A Class A RV yourself? Yes, you can definitely De-winterize A Class A RV yourself it just takes a few tools and supplies.
- Can you hire someone to De-winterize A Class A RV? Yes, many RV maintenance companies can De-winterize A Class A RV.
- How much does it cost to De-winterize A Class A RV? The cost to De-winterize A Class A RV depends on whether you do it yourself or hire someone to do it for you. Costs to De-winterize A Class A RV average $250- $750.
- How long does it take to De-winterize A Class A RV? It takes anywhere from a few hours to a few days to De-winterize A Class A RV depending on how many systems the RV has.
Do you have other tips to De-winterize A Class A RV that we might have missed? Please be sure to share your favorite tricks to De-winterize A Class A RV in the comment
Related Articles
How To Winterize a Class A RV – Skipping These Steps Can Cost You!
